Phase 1: Create New Project
Note: You can skip this Phase if you have already created a project with InfiniteWP. Make sure you select your project before you skip this step.
Step 1: Go to
Google Developers Console
Step 2: Click the [ Create project ] button.
Step 3: Enter a project name e.g.
InfiniteWP, click on the
[ Create ] button.
Phase 2: Connect to your Google Analytics Account [ or ] Webmaster [ or ] Pagespeed
Note: If you haven't created a project with Infinitewp yet, ensure you go through the "Create New Project" Phase.
Step 1: Go to
Google Developers Console
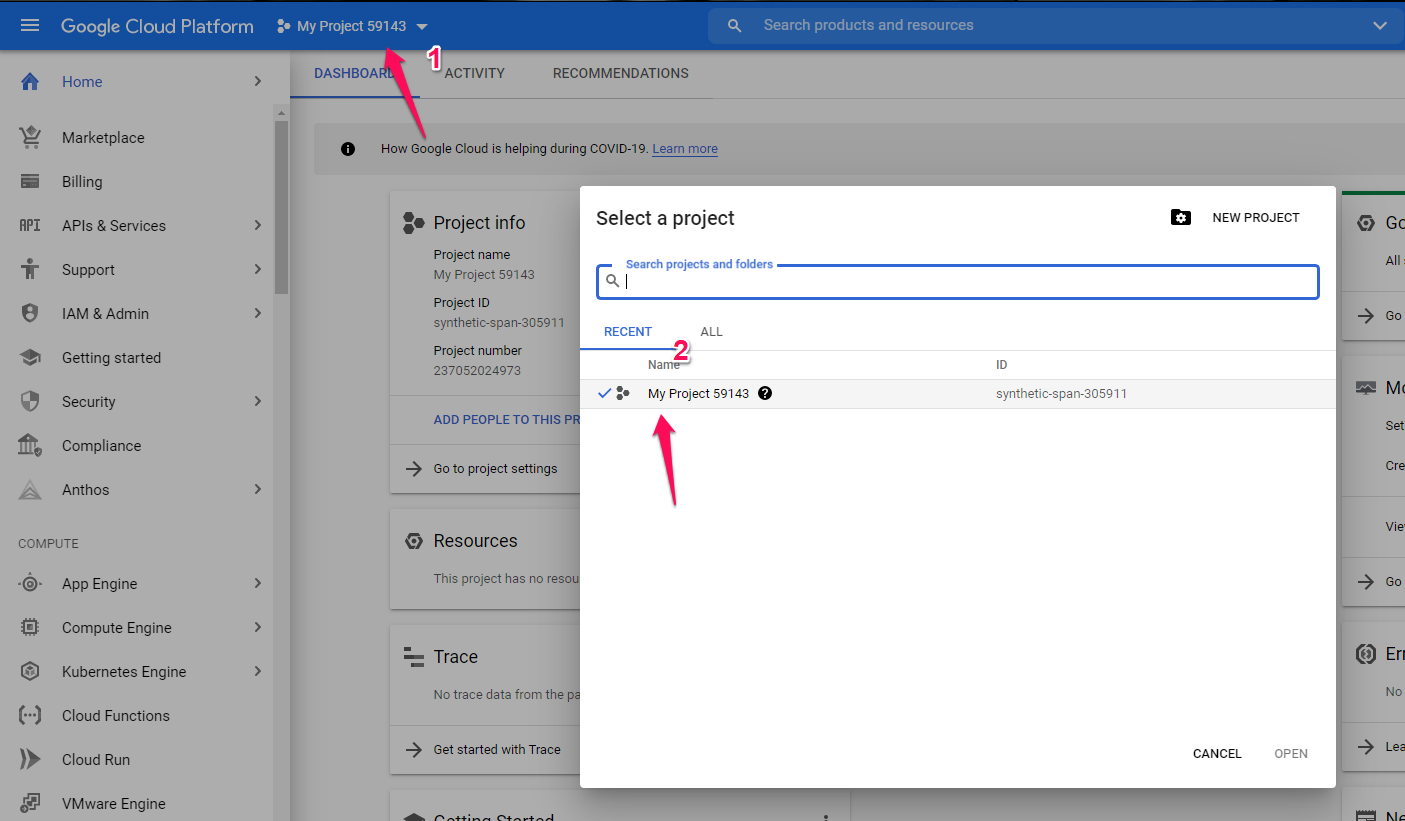
Step 2: Select your Project
Step 3: Click the [ Library ] menu

To Connect your Google Analytics Account
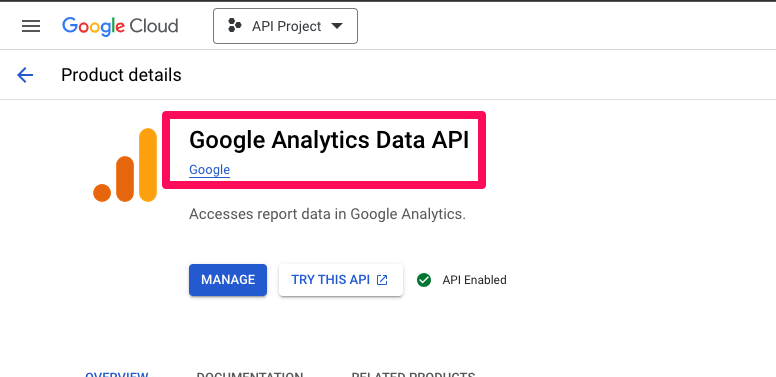
Step 4: Search [Analytics API], then click the [Analytics API] link.

Click the [ Enable ] button.

Similarly, you must activate the two APIs listed below.

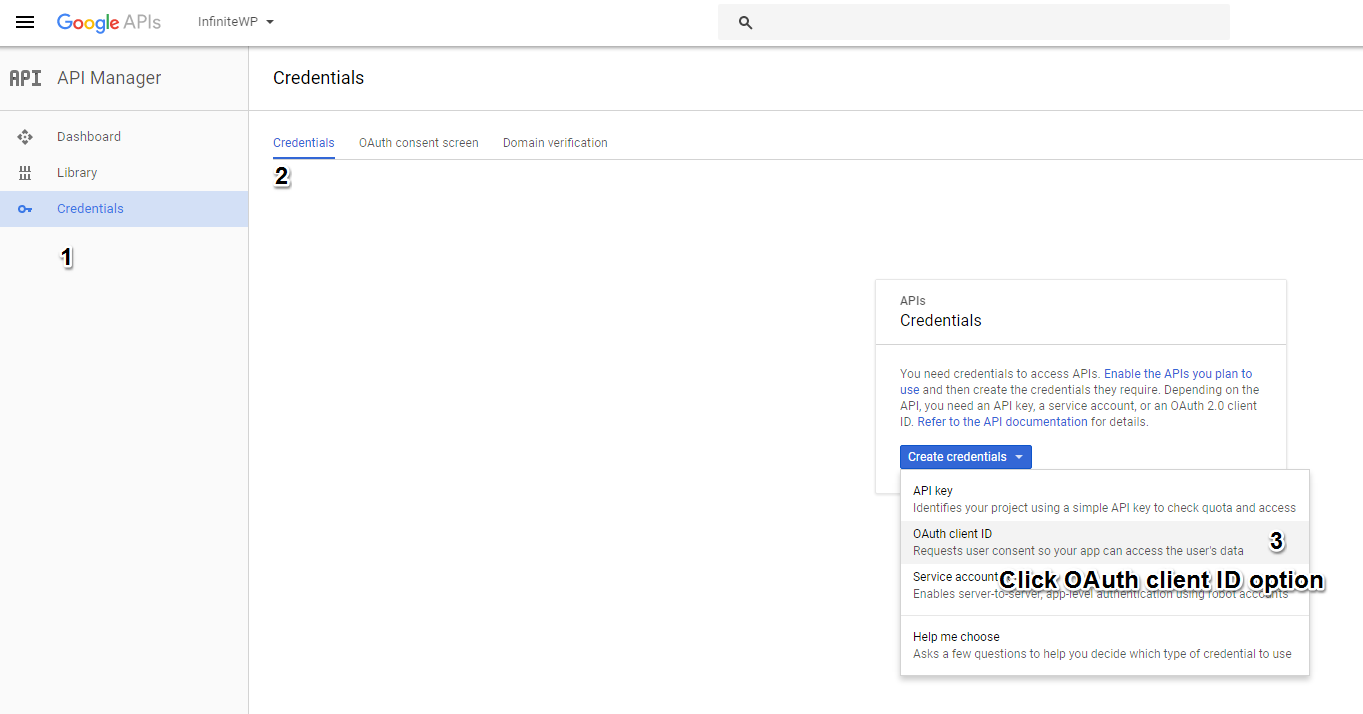
Step 5: Click the [ Credentials ] tab under the API Manager. Now click the [ oAuth consent screen ] tab, fill in the Product Name, and save the process by clicking the [ save ] button.
Step 6: Go to the Credentials section, Click the [ New credentials ] button, and then choose the OAuth client ID option.
You will then land on the
[ Create Client ID ] page. Choose the
[ web application ] option. Enter any name for the Client ID. Now open the
[ InfiniteWP panel ] in another tab without closing this page.
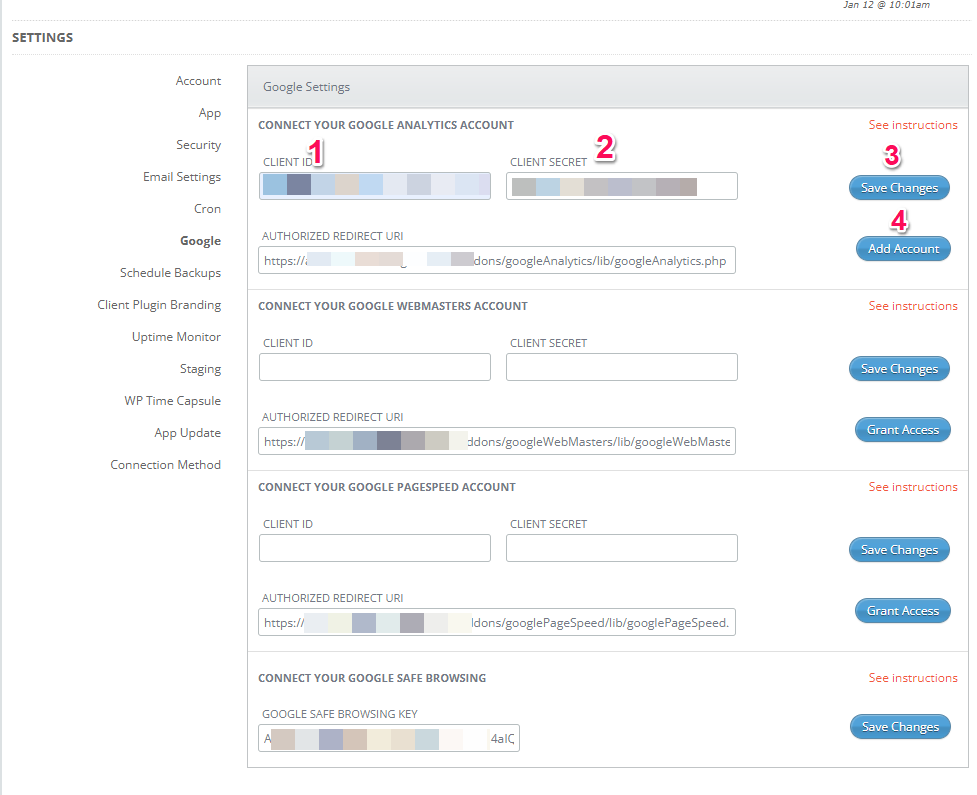
Go to the InfiniteWP admin panel and click the [ Settings ] section. Select the [ Google ] services tab. Now copy the Authorised Redirect URI for the Google Analytics addon. Do not close this page yet.

Now go back to the Create Client ID page, paste the link you copied in the [ Authorize Redirect URIs field ], and then click the [ Create ] button.
Step 7: Copy the Client ID and the Client secret
Step 8: Go to the InfiniteWP panel and open the Google settings section. You can paste the Client ID and the Client Secret in the respective spaces and click the [ Save Changes ] button.
Note: Check and ensure that you are not adding any leading or trailing blank spaces on your Client ID and Secret.
Step 9: Click the [ Grant Access ] button in the Connect your Google Analytics Account section.
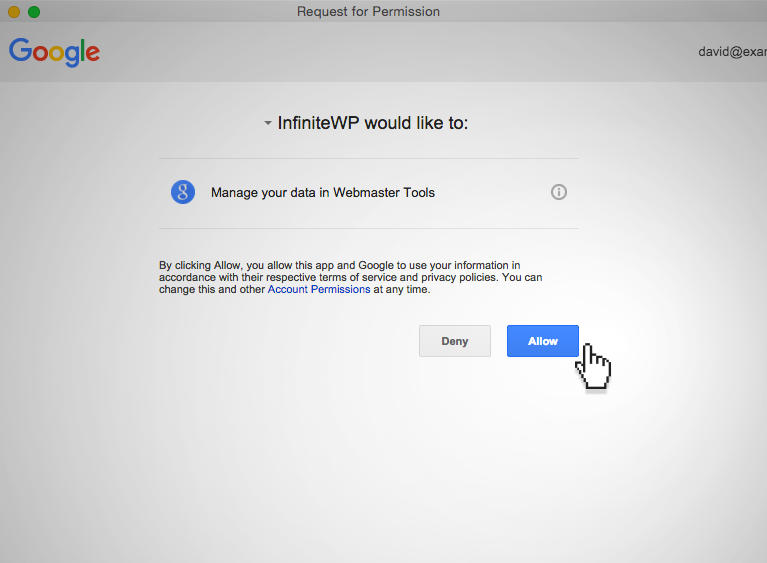
Step 10: Click the [ Allow ] button
Step 11: Congratulations on successfully connecting your Google Analytics account with InfiniteWP!

To connect your Google Webmaster addon
Follow the steps from PHASE 1 and PHASE 2 until Step 3.
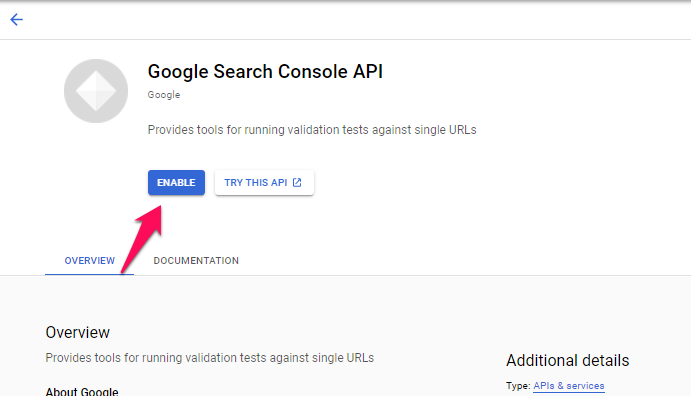
Step 4: Search [Google Search Console API], then click the [Google Search Console API] link.

Click the [ Enable ] button.
Step 5: Click the [ Credentials ] tab under the API Manager. Now click the [ oAuth consent screen ] tab, fill in the Product Name, and save the process by clicking the [ save ] button.
Step 6: Go to the Credentials section, Click the [ New credentials ] button, and then choose the OAuth client ID option.
You will then land on the
[ Create Client ID ] page. Choose the
[ web application ] option. Enter any name for the Client ID. Now open the
[ InfiniteWP panel ] in another tab without closing this page.
Go to the InfiniteWP admin panel and click the [ Settings ] section. Select the [ Google ] services tab. Now copy the Authorised Redirect URI for the Google Webmaster addon. Do not close this page yet.
Now go back to the Create Client ID page, paste the link you copied in the [ Authorize Redirect URIs field ], and then click the [ Create ] button.
Step 7: Copy the Client ID and the Client secret
Step 8: Go to the InfiniteWP panel and open the Google settings section. You can paste the Client ID and the Client Secret in the respective spaces and click the [ Save Changes ] button.
Note: Check and ensure that you are not adding any leading or trailing blank spaces on your Client ID and Secret.
Step 9: Click the [ Grant Access ] button in the Connect your Google Webmasters Account section.
Step 10: Click the [ Allow ] button
Step 11: Congratulations on successfully connecting your Google Webmaster account with InfiniteWP!
To connect your Google PageSpeed
Follow the steps from PHASE 1 and PHASE 2 until Step 3.
Step 4: Search [PageSpeed], then click the [PageSpeed Insights API] link.
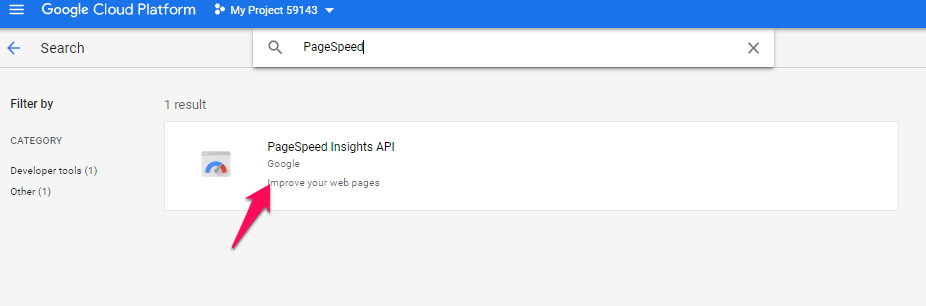
Click the [ Enable ] button.

Step 5: Click the [ Credentials ] tab under the API Manager. Now click the [ oAuth consent screen ] tab, fill in the Product Name, and save the process by clicking the [ save ] button.
Step 6: Go to the Credentials section, Click the [ New credentials ] button, and then choose the OAuth client ID option.
You will then land on the
[ Create Client ID ] page. Choose the
[ web application ] option. Enter any name for the Client ID. Now open the
[ InfiniteWP panel ] in another tab without closing this page.
Go to the InfiniteWP admin panel and click the [ Settings ] section. Select the [ Google ] services tab. Now copy the Authorised Redirect URI for the Google PageSpeed addon. Do not close this page yet.
Now go back to the Create Client ID page, paste the link you copied in the [ Authorize Redirect URIs field ], and then click the [ Create ] button.
Step 7: Copy the Client ID and the Client secret
Step 8: Go to the InfiniteWP panel and open the Google settings section. You can paste the Client ID and the Client Secret in the respective spaces and click the [ Save Changes ] button.
Note: Check and ensure that you are not adding any leading or trailing blank spaces on your Client ID and Secret.
Step 9: Click the [ Grant Access ] button in the Connect your Google PageSpeed Account section.
Step 10: Click the [ Allow ] button
Step 11: Congratulations on successfully connecting your Google PageSpeed account with InfiniteWP!


